
 by
by You can earn more than $3,000 monthly by blogging with these step-by-step guides to register a domain, set up your blog, create content, and monetize it.
Now, let’s begin.
Table of Contents
How do I start blogging?
How can I create a blog and earn money?
The Simple Steps on How to Start a Blog and Become a Blogger
- Decide the topic or niche idea you want to choose for your blog.
- Register your domain name and get a hosting service for your blog.
- Add a blogging platform like WordPress to your hosting.
- Choose a theme and start your blog.
- Install the most relevant blogging plugins to generate traffic and stats tracking.
- Publish your first blog post by writing valuable and compelling content on your blog for your readers.
- Display third-party ads.
- Partner with or Join affiliate marketing programs.
- Sell your products.
Do bloggers make money?
Of course, bloggers make money through different means of monetization such as ad placement, Google Adsense, affiliate, and so much more. Making money as a blogger can only happen when you put in the work of writing compelling content and getting traffic.

How do beginner bloggers make money? And How do I monetize my blog?
Ways Beginner Bloggers Make Money
- Affiliate marketing. The easiest way to make money blogging as a beginner is through affiliate income.
- Google Adsense. This can make you money as a blogger when Google Ads show on your website.
- You can also make money by selling your products on your blog.
- You can make money blogging when you sell ebooks
- Guest Posts. You can do freelance writing on your blog that will earn you money.
What type of blog is most profitable? And which topic is best for blogging?
Thinking of which niche is best for blogging? You can choose the best blogging niche to make money from the list below.
The Most Profitable Money Making Blogs For Niche Ideas
- Personal Finance. Writing about finance or money is one of the best blogging niches that make money. The reason behind this is that everyone is concerned about making and managing money, getting a credit card, entrepreneurs wanting to grow their business income, and individuals looking forward to improving their savings.
- Business & Industry. This niche also makes money when you write about business ideas.
- Health and wellness are also profitable.
- Food & Drink. You can write about a recipe and healthy drinks.
- Writing about traveling and places is profitable
- Beauty & Fitness. This is another great money-making niche where you can write about lifestyle, beauty, and fitness.
- The educational niche is also very profitable especially when you write about scholarship opportunities
Do personal blogs make money?
Personal blogs make money when you write contents that benefit the reader like solving their peculiar problems and providing valuable information.
How do I find my niche?
The Steps to Find Your Ideal Niche
- Figure out what your interests or passions are.
- Think of solutions you can offer to solve problems within your passions.
- Identify the competition within the areas of your interest.
- Identify ways to profit in your niche.
- Then implement your niche idea.
Choosing A Nice
Consider if the Niche:
- Is Profitable (CPC)
- Has traffic (Search Volume)
- Is Competitive

What should I write in my blog?
Lists of things to write in your blog
- Identify a good title from a compelling topic.
- State the post outline with a clear layout.
- Indicate your level of understanding of the topic.
- Freely write the contents the way your readers will understand.
- Offer solutions to the underlying problems in the subject matter.
- Optimize your content to be compatible with the search engine.
How do I write my first blog post?
Steps to Write Your First Blog Post
- Bear your target audience in mind.
- Research the keyword for your post.
- Briefly let them know who you are and your connection with the subject matter.
- Indicate your writing plan
- Do some content research to get some inspiration
- Identify your writing style
- Add inbound and outbound links
- Ensure your keywords are inserted in your title, description, and body.
- Let your writings be SEO friendly
What pages should a blog have?
This is the list of pages your blog should have
- About Us. The About Us page is about your business or who you are.
- Contact Us. This is for contact details to contact you.
- This is to write about not making certain claims to any offer.
- Privacy Policy. The privacy policy page.
- Terms of Service. The page for service offering conditions.
- Products or Services. What your offerings are.
How many views does a blogger need to get paid?
If you can generate well over 10,000 unique visits to your blog on monthly basis, you can very much earn revenue on it from any monetization system you set up on it.
Blogging With WordPress Platform
WordPress is a simple, yet powerful platform to create your blog because it is user-friendly. Besides, it is completely free to use and it offers a huge amount of free plugins that let you customize or add great features to your website.
WordPress is still the best platform to use in blogging because of its flexibility.
How do I create a free WordPress blog?
Here is the step by step guide to creating a free WordPress blog:
- Register a domain name for your blog
- Purchase a web hosting service
- Install a WordPress platform software from the hosting Cpanel
- Login to the WordPress blogging platform
- Install a theme for your blog appearance
- Install all the essential plugins including Yoast for SEO
Choosing a WordPress Theme For Your Blog
WordPress has several pre-built templates called themes which you can use to design your blog or website.
By default, after installing WordPress, there is a pre-built layout that you can start with. This you can later change by browsing through the thousand themes to choose from that would suit the need of your design and niche.

Step by Step Guide to Choose a Theme for Your Blog
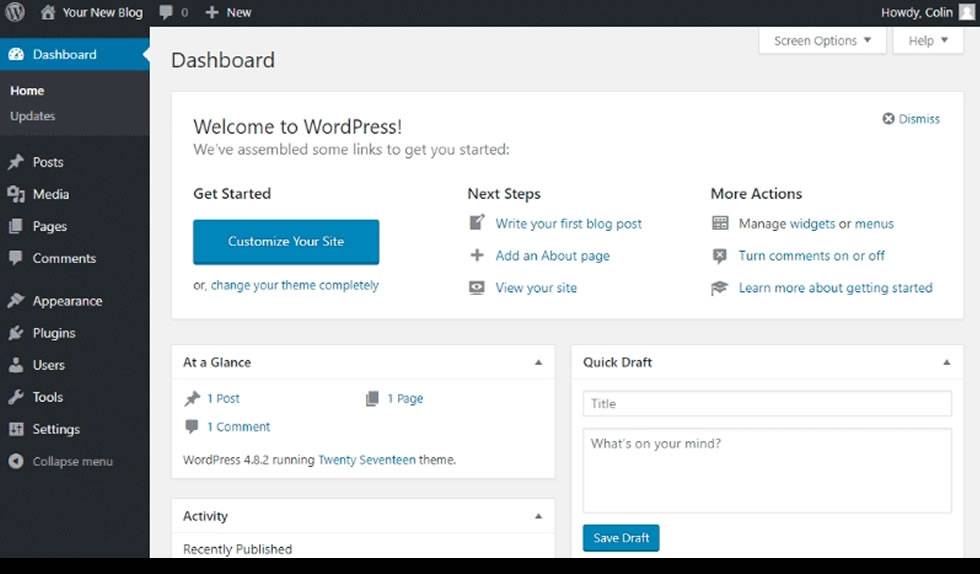
- You need to first login to your WordPress admin Dashboard using this link format: yourdomain.com/wp-admin
- Enter your login details and login
- Now mouse over the “Appearance” menu and click on “Themes”
- At the top, click the “Add New” button to choose from the thousands of available themes
- You can then use the category filter to apply “subject,” layout,” and “feature” to search for the theme that is closely related to what your blog would look like.
- From the available themes shown in the search results, you can decide on which you would use by clicking on its thumbnail to get a preview of what your blog would look like.
- Once you decide on the theme to use, click the “Install” button.
- When the installation process completes, click the “Activate” button and you are good to go.
- That’s it. You now have your WordPress theme installed.
After following the above processes to install a WordPress theme and you do not find what you like, you can purchase a premium theme from platforms like:
- Elegant Themes
- Themeforest
Since you now have your theme installed and activated, the next step now is to customize your theme layout.
Customizing Your WordPress Blog
WordPress themes are the basics and functionalities of your design. There are also a couple of plugins you can use to add a form, slide, or more features that will extend your blog functionalities
These plugins are not always available by default and require you to install them when the need arises as part of the process to customize your blog.
Step by Step Guide to Customize Your Blog
- Still, in the theme section of WordPress admin Dashboard, click on the “Customize” button of your currently active theme.
- Different themes usually come with different sidebar menu options.
- Now under the “Site Identity” section, you can add the blog name and its tagline.
- You can even go through other section to see what changes you would like to make.
- And when you are done, click on the “Save and Publish” button.
Optimizing Your WordPress Blog for Search Engine Traffic
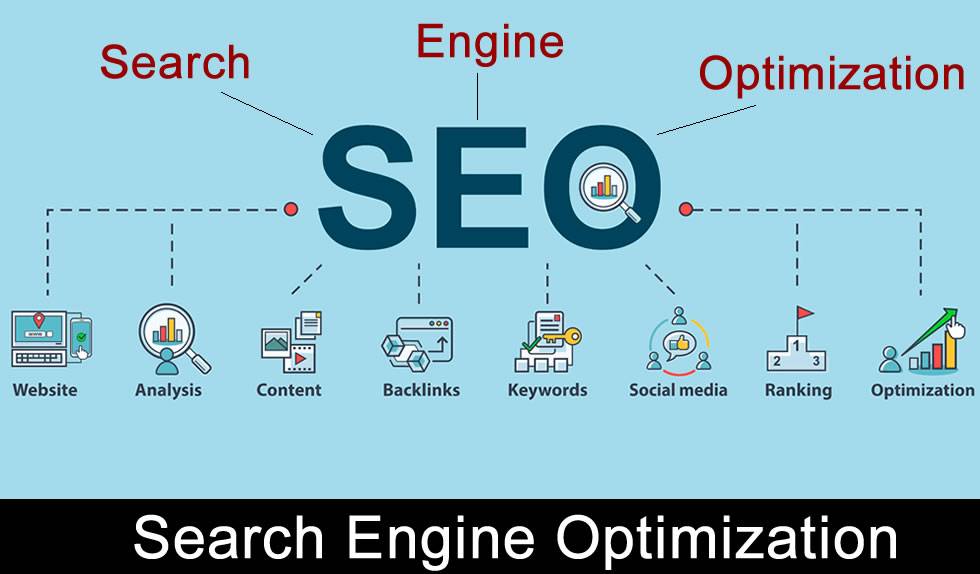
The search engine is the main source to generate traffic to your website which you can monetize. And Search Engine Optimization (SEO) which is a multi-billion dollar industry can help you to achieve that aim.
SEO allows the optimization of your website so that it can be found in search engines with particular phrases or keywords.
Optimizing your blog for SEO is another big benefit of using the WordPress platform. So you need to create SEO-friendly and engaging content to build a good relationship with your audience or readers.
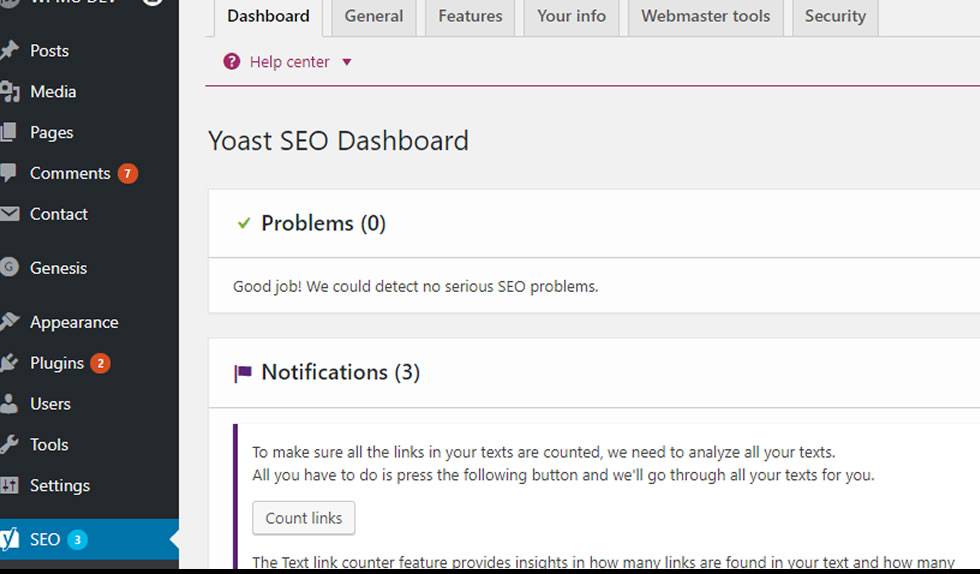
And the best way to begin with optimizing your content for SEO is to install the Yoast SEO plugin.
Step by Step Guide to Install and Customize the Yoast SEO
- Mouse over the plugins menu on the left side
- Click on “Add New”
- Type and search for “Yoast SEO” in the search bar
- When it shows up in the search result, click on the “Install Now” button.
- Now click on the “Activate” button to activate the plugin
- To customize the “Yoast SEO”, click on the “SEO” menu on the left side of the dashboard
- The Yoast SEO settings will open up
- Click on the “Your Info” tab to enter your blog details like website name and tagline
- Now click the “Save Changes” button
- The next step is to go to the “Webmaster Tools” tab and click on “Google Search Console” which is a webmaster tool that lets you submit your site to Google’s search index and for optimizing your visibility.
- This will now redirect you to where you will need to sign in to your Google account using your Gmail.
- After logging in, click on the “Alternate Methods” tab and then select “HTML tag.”
- Now copy the alphanumeric string without the quotation marks in the drop-down that will appear with your search console meta code.
- Go back to the SEO settings of your WordPress dashboard and paste your meta code into the text box of Google Search Console
- Click “Save Changes”
- Lastly, click the “Verify” button.
ALSO READ: Ways To Optimize A Blog Post To Be SEO Friendly
XML Sitemaps
The XML sitemap is a file containing your website’s URLs that lets Google and many other search engines crawl your website for new posts and pages update.
The Yoast SEO setting comes with XML Sitemaps which is enabled by default. So the XML Sitemaps built-in feature automatically updates your sitemap.
Setting Up Your Permalinks
Permalinks are a linking structure for each particular page or blog post. The permalinks in WordPress, by default, are usually set as yourwebsite.com/postid of a blog post or page.
The linking structure of permalinks allows users to easily identify a particular page name or a blog post.
These are the steps to set up the structure of permalinks:
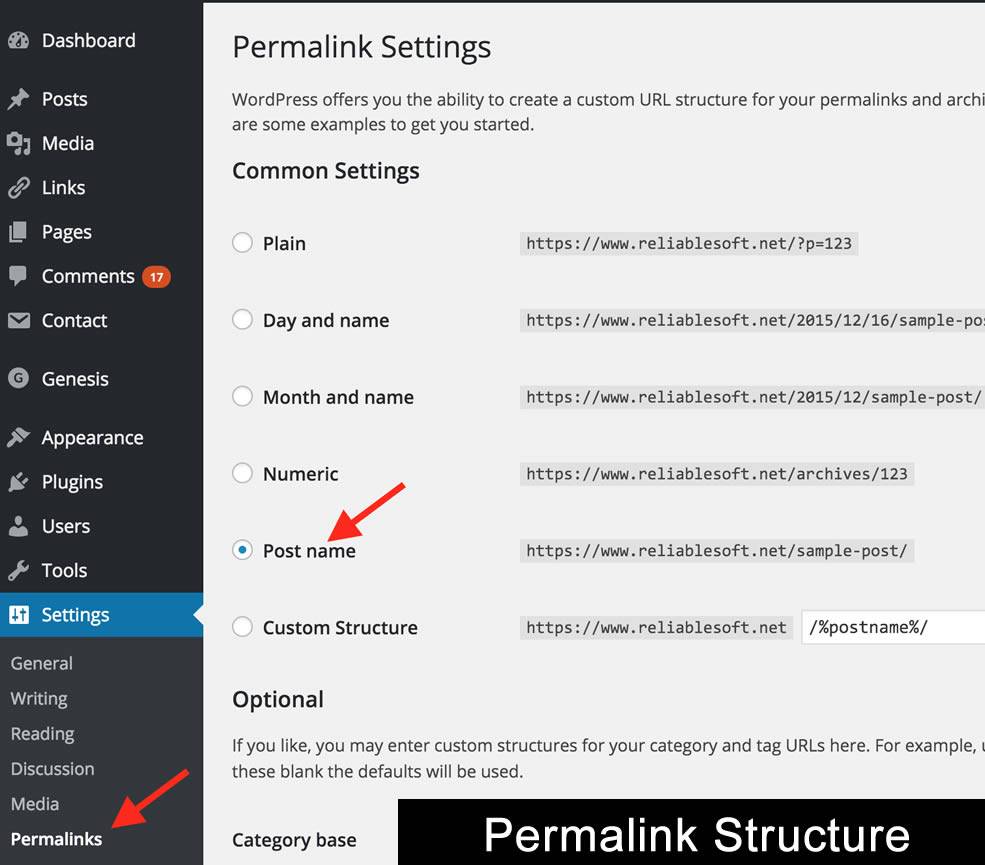
- Mouse over “Settings” on the left side and click on “Permalinks.”
- On the permalinks settings, you will see a couple of options to choose from.
- You can choose the “Post name” option because it uses the title of a post which also contains the keyword of the content you are writing on.
- Finally, click on Save after selecting your option.
Now you have covered a couple of the blogging processes such as purchasing your domain, getting your hosting plan, installing a theme, and the necessary plugins like the Yoast SEO to optimize your website so that you can be found easily on search engines.
The next step is to have an idea of what you want to write for your niche blog.
Let’s dive in.
Writing Your Blog Post
Posting in WordPress is super easy as it has an editor that is similar to the tools found in word processing applications.
Here are steps to post content in WordPress:
- On the left sidebar of your admin Dashboard, mouse over the “Posts” menu
- Click on “Category”
- Here you can different categories for different posts
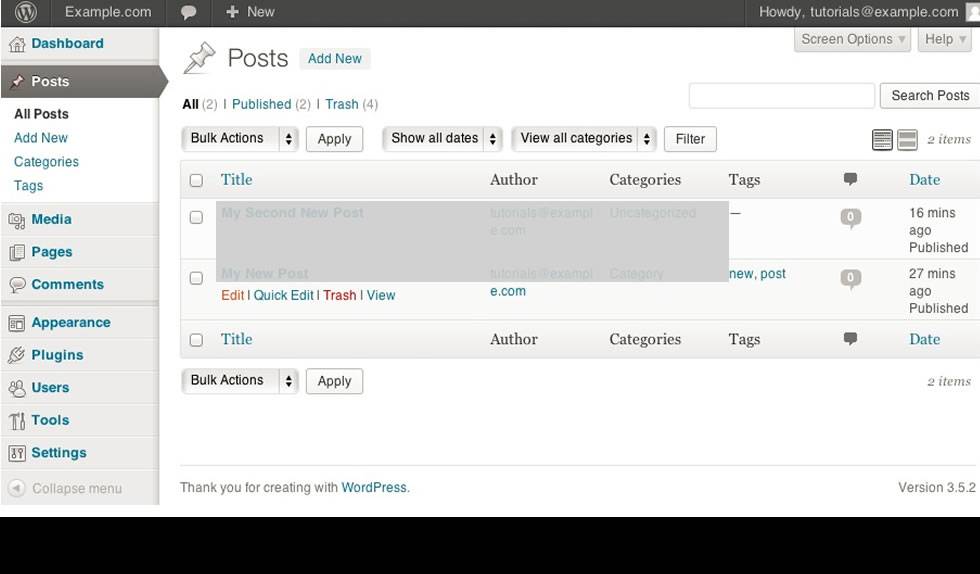
- On the left sidebar of your admin Dashboard, click on “Posts”
- This will show the full list of your blog posts if you have already posted any.
- To create a new post, click the “Add New” button at the top of the posts.
- The editor will open up where you can enter your title and start writing your blog content.
- To add several features like media, headings, etc. click the “+” symbol on the right corner which will show the Gutenberg blocks of WordPress.
- You can also add several images to your blog post which will help to engage readers in an illustrative pattern far better than just expressive words.
- So to add an image, place your curse where you would want it to appear. Then click on the “+” symbol where you can select the block for the image which will direct you to where you can upload or select the image from your Media Library if you have already uploaded it.
- The image will be inserted into your post
- When you are done writing your post, the next thing to do is to optimize it with the Yoast SEO plugin. This can be done on the Yoast SEO settings which can be found at the bottom of the post you are writing. Ensure you have the Yoast SEO plugin installed to see all these features.
- The section of the Yoast SEO settings to fill information on include “SEO title,” “meta description,” “slug,” and “focus keyphrases.”
- Ensure you use an SEO title that can draw attention and a meta description that will briefly explain what your post is all about.
- After filling the settings, a preview will be generated showing how your post will show up when it is found in the Search Result Pages of Google Search Engine.
- In the process of optimizing the Yoast SEO settings, real-time feedback will be provided indicating areas where you need to make adjustments or improvements. You should aim to target lots of green icons as much as possible. If you can get up to 80%, then you are good to go.
- When you are done with the above processes of posting, go over the post to ensure everything looks great. This will include grammatical-error-free, typos look good, headings are well used for easy reading.
- When everything looks good, then it is time to publish your post.
- Simply scroll to the top of the page, just at the top right-hand corner of your screen, and click the publish button.
- Immediately you click on publish, your post will go live.
- That’s it. You have successfully created a well-optimized search engine blog post
Installing The Essential WordPress Plugins For Your Blog
- Yoast SEO – All pages to be optimized for keywords and description
- Easy Social Share Buttons
- Google Analytics and Search console
- Classic Editor
- Title and Nofollow For Links – By WPKube
- Web Push Notification
- Chatbot
- Broken links identifier plugin
Search Engine Optimization (SEO): Off-Site SEO
The search engine is a repository of information that acts like a machine that crawls the internet using a spider to save and index information. Search engines include Google, Yahoo, Bing, Yandex, etc.
Contents
Whatever is posted on a blog is called content.
Ranking
This is the indexing of websites or contents on the Search Engine Results Page (SERP). The search engine can determine whose post will be indexed on the first page and this also depends on the optimization factor.
How To Generate Contents Idea
You can generate content by using the Spy Strategy where you can copy the strategy of the top-rated guys in your niche with keywords research.
Using Google Trends To Generate Contents
You can search Google trends on Google to get the link. Google trends are very ideal for news website because it brings about what’s trending.
USING KEYWORDS TOOL TO RESEARCH OR ANALYZE KEYWORDS
Keywords research saves you a lot of time to rank well on the search engine.
USING SPY STRATEGY TO GENERATE CONTENT ON WWW.AZADSEO.COM
The SPY strategy is the biggest secret of blogging success because it helps you to analyze and research keywords that competitors are ranking for. This will save you a lot of time and gives you lots of traffic that will generate good income because huge traffic brings in a good income for you.
Keywords Research By Country & Niche Competition Using The Spy Strategy
You can do keyword research by country or a niche a competitor is ranking for as follows:
- Top 5 [NICHE KEYWORD e.g. health, food, etc.] blog in the US
- This will give you an idea of the websites performing well in your industry. It will also give you the idea of what people are searching for that will lead to huge traffic because your blog needs traffic to generate and sustain income.
- Copy their website address
- Then log in and paste the competitor’s website to the AHREF section of azadseo.com
- Member Area: https://members.azadseo.com/member
- Dashboard: https://ahr.azadseo.com/dashboard
5. Run a search on the keywords
6. The search will display the following which can still be narrowed or niched down:
- Keywords the website is ranking for
- Monthly Search volume
- CPC: Cost Per Click
- Keywords Difficulty (KD): How easy or difficult is the keyword to rank for. This is the most important. The lower the number the better which won’t be competitive. The KD should always be lower than the domain authority.
- Position: Ranking position on the search
- Traffic the competitor is accumulating from the search volume.
7. Then after the analysis, look out for the low competitive and low keyword difficulty keywords with good CPC and search volume to go for. You can then use the keyword to search on Google to generate content that you can re-write.
8. Keyword Difficulty or KD difficulty should be lower. The lower the better to rank for a particular keyword. The difficulty should be 30 and below.
9. Domain authority should always be higher than the Keyword difficulty.
10. That’s it! This is the most powerful aspect of succeeding in blogging.
Also, try as much as you can to write on what people are searching for and not what you feel like writing.
Moz Keyword Difficulty is much more accurate than the one provided by AHREF from www.azadseo.com
Using Ubersuggest As A Keyword Analyzing Tool
- The Ubersuggest link is: https://neilpatel.com/ubersuggest/
- Just paste the keyword and the data will display.
- SEO difficulty should be lower. The lower the SEO difficulty, the better the keyword will rank. The difficulty should be 30 and below.
Using www.moz.com As A Keyword Analyzing Tool
Steps To Follow:
- Login
- Scroll to link explorer and paste the competitor’s URL link
- Then search
- This will display keywords being searched for, search volume, etc.
To Analyze Keywords Data On www.moz.com
- Click on Free SEO Tools
- Click on Keywords Explorer > Search keywords
Analyzing Domain Authority Data On www.moz.com
- Login
- Click on Link Research or at the top menu, click on Free SEO Tools
- Click on Link Explorer
- Click on Get link Data
- Enter the domain name
- Then search.
- The result will pop up
Content Quality & Duplicate Contents Issues
Original or quality content is a very important criterion for ranking as Google doesn’t take duplicated or plagiarized content issues lightly. So if you must use other people’s content, try to edit it in your own words to make them look original or unique.
Any content already published on your website, should not be republished on the same website as Google crawlers see them as duplicate contents and will penalize you if found violating this policy.

Technical SEO: On-Site SEO
Loading Speed
Speed is a very important factor in on-page SEO. Ensure you don’t have many plugins that will slow down the speed of your page.
Backlinks
Backlinks are links from external sources. The more backlinks you have the better your chances of having a higher domain authority.
Dofollow Backlinks And Nofollow Backlinks
Dofollow backlinks and no-follow backlinks are two ways of identifying a link and telling Google how to associate the website you are linking to your website. Dofollow links are a way to pass on authority to a website, while a no-follow link does not pass on link juice.
How To Get Backlinks
- Link Outreach
- Guess Posting – You post for the big guys in your industry and insert your link.
- Sponsored Posts – You sponsor a post and insert your link
- Forum Post – You post in the forum network and insert your link
- Profile Backlink – Platforms like LinkedIn, Pinterest where you can create your profile and insert your website.
Quality of Backlinks
- Get backlinks from websites with high domain authority
- Don’t get links from spammy websites like porn websites
- Build links from websites relating to your niche
Easy Ways OF Getting Backlinks Using The Spy Strategy
- Go to Google and search for the top 5 blog websites in your niche
- Then go to azadseo.com
- Log in and go to the AHREF section
- Click on site explorer at the top menu
- Enter the competitor’s website address and search
- This will display all the backlinks of the competitor
- You can then find ways to get backlinks from the ones of your competitor
WEBSITE TRAFFIC SOURCES FOR BLOGGERS
Traffic refers to the group of people inflow to your website. Traffic can be organic which comes from search engines and inorganic which comes from other sources.
How To Get Traffic
- Search Engines – Search engine traffics are those that come from search networks like Yahoo, Google, Bing, etc. You get organic traffic by writing content on keywords that people are searching for.
2. Social Traffic – Traffic coming from social media platforms.
- Social media traffic builds brand awareness.
- It brings recurrent visitors.
- You can run a campaign to boost likes
- Share posts on your page regularly
3. Email Campaigns – This is to generate traffic through email marketing like the newsletter. Examples of email marketing platforms include MailChimp, GetResponse, ConvertKit, etc.
4. Web Push Notification – This allows site owners to notify users about new updates which pop up on their browsers. Companies that offer push notification:
- onesignal.com: This one offers a free push notification service. How to use it:
i. Login to your dashboard
ii. Click on Messages
iii. Click on New Push
iv. Then it will redirect to where you can customize your message and send it.
v. You can write the title of your already published blog post or something catchy
vi. Copy the summary of your blog post
vii. Insert the image to use
viii. Insert the URL
ix. Then click on confirm to send
- wonderpush.com: This offers a premium service
5. ChatBot – This can be used to get recurrent traffic. It works similarly to web push notifications.
- It can be installed as a plugin that shows up at the footer of a website.
- The moment anyone clicks it to chat, it will automatically add the person to your chatbot messaging platform
- So when you send messages with it, the person will get them.
6. Paid Advertisement – Running adverts to get traffic. Examples include Google Adwords, Facebook, Adstera, etc.
7. Referral Traffic – Traffic you get from other websites
Retaining Traffic With Push Notification
Ensure you can retain the traffic to your website using push notification to keep the recurrent traffic and to build your authority in your niche
How can I promote my blog?
These are the ways to promote your blog
- Optimize your blog for SEO to get organic traffic.
- Ensure you do thorough keyword research for every post.
- Share every blog post on social media.
- Use paid ads to promote your posts on ad networks.
- You can also implement email marketing to promote your blog.
- Use guest posts to promote your blog on high authority blogs in your niche
How can I make my blog popular?
Proven steps to make your blog popular
- Narrow down your blog to a specific niche.
- Keep improving yourself and be an Expert in your niche.
- Implement Google Search Console to analyze search data on your website.
- Ensure your blog posts are well optimized for search engines and mobile.
- Make your blog interactive with content and tools to keep your visitors for long.
- Keep your readers engaged by encouraging them with activities like commenting on your posts.
MONETIZATION: How To Monetize Your Blog Part 1
Google Adsense
Google Adsense can act as a means to monetize your blog. This allows third-party advertiser’s ad from Google to show up on publishers’ platforms which a publisher can profit from through monetization.
Google AdSense is the advertising network by Google where you can become a partner to allow ads from their network to show on your website for monetization purposes.

Applying For Adsense
Simply post original content on your blog, create a Gmail account and then apply. You can check out the link via Google search by visiting the URL: adsense.google.com.
After applying and getting approved, you will still need to verify the account using some government means of identification. You will also need to verify your address through a code that will be sent to your address by Google.
When you receive the code, you will then input it on your Adsense account. The code letter will take about 3 weeks to arrive.
You can also choose to buy an Adsense account from vendors who specialize in creating the accounts in case you don’t have the luxury of time to wait for the approval time.
Google Adsense Stages
- Approval Stage – This is when you post content on your blog and then apply for Google Adsense using a Gmail account. After Google reviews your application and it adheres to their policies, they can then approve it. In case they do not approve of it, you can still reapply.
2. Verification Stage – This is when you will be required to verify your ID and address. The ID verification can be carried out using your Passport and when your earnings reach $10.
Then the address verification will be performed when Google sends you a letter containing a pin to the address you specified it should be sent to. The letter usually arrives within 4 weeks depending on your location.
Accessing Your Adsense Account
- To access your Adsense account, first, you need to log in to your Gmail.
- Then open a new tab and visit the URL: adsense.google.com
Entering Payment Method
- From the Adsense dashboard, click on payment by the left side
- Enter your domiciliary account details which include your account number, swift code, etc. And If there is other information you need about your account, you can contact your bank.
Some Google Adsense Terminology
Cost Per Click (CPC)
CPC is how you earn on Google when users click on third-party ads or navigate through pages with Click Through Rate (CTR) on your website.
Cost Per Click is also how an advertiser is willing to pay for his ad to run on the Google Ad network. Also, try not to click on ads running on your website as it is strictly against Google’s policy.
Influencing CPC To Increase Its Value
- By getting traffic from countries like US, Uk, Australia
- By using the Blocking Controls option to remove low CPC ads and adding High CPC ad
- Click on Blocking Controls
- Click on the Ad review center
- Then you can remove the low CPC ads by clicking on the block icon
- You can add the high CPC ad by using the Filter search field to add categories which you can type for a hint or simply inserting the advertiser’s website.
The minimum payout is $100
Access and authorization grants access to a third person for joint purposes.
The policy center gives you access to see if there is any violation from your end.
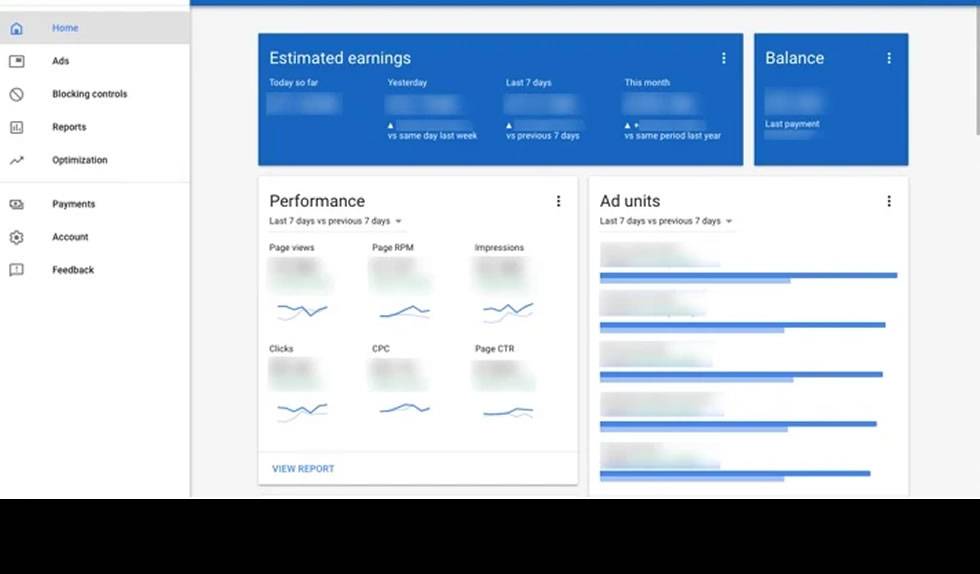
EARNINGS ESTIMATION
Example: Using 50 Contents With 100 Views Per Content In A Day
- 50 contents by 100 daily views will result = in 5,000 daily content views
- 5000 views visiting 3 more pages will result = 15,000 views
- If they are US audience with 10% Click Through Rate (CTR) and $0.20 CPC, The Earning per day will be $300
Withdrawing From Your Adsense Account
- Payment can be withdrawn on the 21st of each month. When you reach a threshold of $100 and above, you can initiate a withdrawal on the 21st of each month.
- The withdrawn amount will reach your account within 5 working days.
How much does AdSense pay per 1000 views?
The average pay per view is usually between $0.10 and $0.30 which varies from what the advertiser pays. Also, Google pays out 68% to publishers from the AdSense revenue.
Does Google pay per impression?
Google pays per impression which usually fluctuates based on several CPM factors. However, for every 1,000 impressions, the average CPM is between $1 and $1.5.
Does AdSense pay monthly?
Google AdSense pays their publishers on a monthly cycle which is made possible after you have completed the necessary steps to get paid.
The payment is usually issued between the 21st and the 26th of the monthly payment cycle.
How much will Google AdSense pay me?
Google AdSense will pay you per click on your ads and the payment made to publishers is usually a 68% commission of third-party ads that show on your website. The commission varies with an average that is between $0.20 and $15.
Is Google AdSense CPC?
Google AdSense is a CPC program where your Ad revenue will be impacted based on your CTR and your audience value.
What is the minimum traffic for AdSense?
Google AdSense does not require minimum traffic to approve an AdSense account. However, there might be other criteria that Google uses to approve AdSense accounts and this might not be tied to just traffic sourcing.
Is my website eligible for AdSense?
Your website can be eligible for AdSense approval if you have up to 20+ original and compelling content on your blog. Also, the domain name of your website must be a top-level one such as .com, .org, .net, etc.
How many posts are required for AdSense?
The number of posts required for AdSense approval doesn’t have a specific limit, but you should aim to have 20+ quality and valuable content on your blog before you apply for Google AdSense.
When should I apply for AdSense?
You can apply for AdSense when you have a good number of original and quality content posts on your blog. You can also apply for AdSense when read and ready to adhere strictly to their program policies. And ensure you have other pages such as About, Contact, Privacy, Disclaimer, Terms, and Conditions on your blog. You will need to create a Gmail account which is required to apply for the Google AdSense program.
How do I start Google AdSense?
You can start Google AdSense with the following steps
- First, visit this link: Visit: https://www.google.com/adsense/start
- Then click on Get started.
- Sign in using your Gmail account.
- Select the options applicable to you.
- Choose your payment country or territory.
- Now review and accept the Terms and Conditions of AdSense
- You can then click on “Start Using AdSense”.
MONETIZATION: How To Monetize Your Blog Part 2
Choosing A Niche
It is a good idea to focus on a niche that will scale faster.

Other Means To Monetize Your Blog
Other means of monetizing your blog shouldn’t go against Google’s policies.
- Affiliate Marketing – This is about promoting other companies products on your website to get a commission. Affiliate products can be compatible with Google’s Adsense as long as they are not adult content like porn, penis enlargement, women’s orgasm, etc.
Getting Affiliate Products And What To Consider
- You can get affiliate products by doing a Google search on the “affiliate [niche] website” to see the availability of affiliate products.
- You can get affiliate products from maxbounty.com
- Perceived values of the product you are trying to promote
- Product availability and relevance to the audience
- Pricing affordability to the product value
- Pay Per Click (PPC) Networks – They are advert networks similar to Google Adsense that pay you to have their adverts on your website. Examples of PPC Networks include Mgid, Propeller, Adsteria, Taboola (pays more than Google Adsense but you need to have a level of traffic before you can be accepted into their program), Mnet, Media.net, Ezoic, etc.
- Sponsored Guest Posts – This is the way of monetizing your blog when it has grown. People will write sponsored posts asking you to publish them on your website for a fee.
You can include a separate page where you explicitly state how it works and its specific fees. Also include a contact page for them to contact you easily.
You can accept payment using www.payoneer.com, www.skrill.com, etc. Payoneer can even open a bank account for you in different countries with different currencies like US (Dollar), Uk (Pounds), Germany (Euro), etc. Payoneer can send you a Master credit card that can be used on any ATM.
- Direct Product Sales – This is where companies advertise their products on your website.
- Personal Product Sales – You can as well choose to market your product’s niche on the blog.
Google Analytics
Google Analytics enables you to get reliable authentic data about your visitors and website performance. These data can include the location of website traffic, audience engagement with your content, etc.

To access the Analytics dashboard:
- Login to your Gmail account
- Then visit the link: analytics.google.com/analytics/web
- Real-Time > Overview. This will show up real-time activities of people currently on the website
- The Audience Overview will show up information by date range
- Audience Overview also shows info about new users, returning users, by language, by country, by city, type of browser and OS used, type of mobile device used, etc.
- The audience also shows up other data like demographics, interests, behavior, etc.
- Acquisition overview shows the platforms where your users are coming from. Maybe search engines, social networks, etc.
- Behavior shows up all data like page views, the pages being viewed, etc.
Google Console
This brings about searched data using Google search crawlers to filter the metric generated on your website as a determining factor to rank your website.
Posting Well-Optimized Contents & On-Page SEO Strategies
Before posting content on your blog, ensure you put everything in place to optimize your posts.
Optimizing your posts With On-Page SEO Strategies:
- Perform keywords research using AHREF should be included in the title and body of posts.
- Check out for typos and grammatical errors in your posts
- Several headings like H1, H2, and H3 should be in your posts for further clarification with sub-meanings.
- By default, the title is in H1.
- So other headings should either be in H2 or H3.
- H2 can have a sub-heading of H3 and H3 can also have a sub-heading of H4
The Essence of Using Sub-Headings
The essence of using several sub-headings in a new post is to ensure you rank for multiple keywords using one article. So make this a priority when you are making a new post for your blog.
4. Insert internal linking showing something like: “ALSO READ: XXXX”. This makes Google crawlers easily navigate from one post to another to rank your page. Also, insert links on some texts of a post that will link to another post relating to it within the blog.
Bounce rate (leaving a website instantly) on your website can be reduced if there are more internal links as your visitors tend to spend more time on your website by visiting those links. The lesser your bounce rate, the better the chances Google crawlers will index your website.
5. Also, insert an external link going to the external source website. Remember to make it open in a new tab and add a no-follow linking option so that you don’t pass your domain authority to another website.
6. Now insert focus keywords or keyphrases and meta descriptions. The results of your SEO analyzing activities and what needs to be fixed will show up at the bottom of your post.
NOTE:
- Ensure the Yoast SEO plugin is installed
- If everything looks good, the score icon should be in green color.
- The focus keywords should be in the title of the post
- Focus keywords should also be in your first paragraph
- The focus keywords should also be in two other places within your post and in the meta description
- Avoid keyword stuffing. This is the excessive usage or repeating of keywords in your post. This will discourage the search crawlers from indexing your website.
- Add some images within your post and add the focus keyword in the alt section
7. Next, select the category where the post will appear. Avoid selecting too many categories so that Google won’t see it as duplicate content.
8. Now add the featured image which should have keywords in Alt, Title, Caption, and Description
9. Then click publish and your post will be live.
You can access more resource information with this link.
SUMMARY OF HOW TO START A BLOG
Platforms To Build Your Blog
- WordPress (This is the most recommended platform)
Niches
This is your ideal choice to choose your blog coverage. You can’t be everywhere. Just choose one idea to go with.
If it’s health, narrow it down to sub-niches and focus on it. The same thing applies to other niches like finance, education, tech, etc.
Getting Contents Ideas
You don’t have to stress yourself on generating content for your blog. Just use AHREF on www.azadseo.com to do keywords research.
Steps to getting contents ideas:
- Use AHREF on azadseo.com to do keywords research.
- Search for the top 5 guys in your niche
- Copy their websites address and go to the AHREF section of azadseo.com to do keywords research
- Then lookout for the low competitive and low keywords difficulty keywords to write on
- Also, ensure your domain authority is higher than the keyword difficulty figure of the keyword you are trying to write on
Traffic Sources
In blogging traffic is a key prerequisite to generating income.
Two main traffic sources:
- Organic – This type of traffic comes from the search engine like SEO by identifying low keyword difficulty keywords that you can easily rank for.
- Inorganic – This is the type of traffic that comes from other sources like social media, email, web push notification, chatbots,
So having a combination of all the traffic sources can go a long way to boost your traffic that will result in earning you much money.
Monetization – Means of monetization:
- Google Adsense (This is the primary means of monetizing your blog)
- Pay Per Click
- Sponsored Guest Post
- Sponsored Ad
- net
- Taboola
- Adsteria
- Promoting your product
Google Analytics
Google Analytics helps you to analyze your website data like the traffic location of your visitors, their demographics, device, page views, etc.
You can read more articles on businesses you can do online.
You can leave a comment below to ask questions or give an option of what you think about how to start a blog and monetize it.
I must thank you for the efforts youve put in penning this site. I am hoping to check out the same high-grade blog posts by you in the future as well. In fact, your creative writing abilities has motivated me to get my very own blog now 😉
Thanks Peter. See you on the greater side.